By
P. Gupta,
Technical Advisor, COWI – DIPL Consortium, Naini Bridge Project, Allahabad, India
And (Ex) Material Consultant Allahabad By-Pass Project, Allahabad
ABSTRACT:
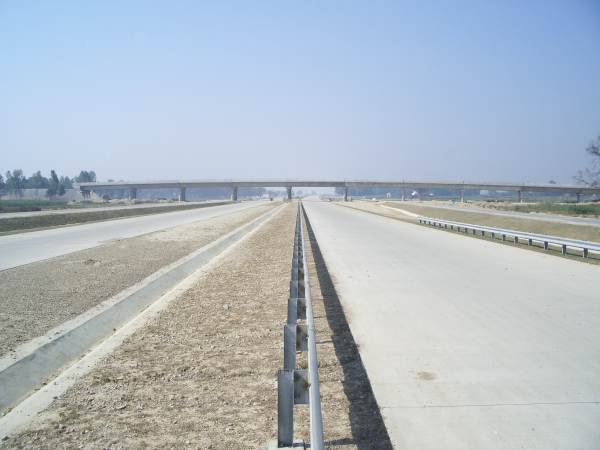
Large scale construction of Bridges & Highways is going on in India and World over.
- They are mostly made as rigid pavements using Pavement Quality Concrete (PQC). On one hand, concrete is a very good and strong material, but it develops cracks due to temperature, shrinkage, creep, etc. Until enough precautions are taken, some cracks do come up on the concrete surfaces.
- Prominent cracks should be repaired for better performance and longer life of Highways/pavements. To repair these cracks, several materials and procedures have been developed. The efficiency of these materials and procedures depends on the type of crack, weather conditions, and applicator efficiency.
- In this paper, various procedures of crack repair are described. However, any procedure, in general, should be first tried on a pilot basis, and then depending upon its success, repairing of cracks be done at the site.
- A procedure of injecting low viscosity Epoxy Material is an excellent material. It is discussed here and can be used for the repair of cracks.
Why Concrete Cracks:
First, it is necessary to understand why the concrete cracks. There can be many reasons why the concrete cracks. These need to be understood from its reaction and setting pattern point of view. The main reason is improper concrete mix design and laying/jointing practice related to the inherent nature of concrete to change volumetrically due to moisture, reaction and thermal effects, etc. The incidence of cracks can be minimized by improving concrete mix design, laying time weather condition, and jointing practices with timely saw cutting and properly managed to cure.
Concrete roads, properly designed and constructed, should require little if any, maintenance over their design life. Still, proper and timed maintenance may extend the life of the pavement even beyond designed service life. Concrete pavements undergo stress and strain due to traffic and climatic effects. However, as long as the subgrade is properly compacted, any variation/change in support (due to moisture changes) has little effect on performance. Proper weather during construction and laying/jointing practice will eliminate most premature distresses. Otherwise, some shrinkage cracking may appear before the road is opened to traffic. Normally, there is no reason why a concrete road should not perform well during the designed life span if properly laid and cared for through maintenance.
A) Identification of Affected Area:
The relevant pavement is surveyed and the affected portion is marked with a marker. The area can be struck with a handheld hammer to further qualify and quantify the crack. The dull and hollow sound is emitted from the unsound concrete whereas metallic sound is emitted from sound concrete. The boundary of the area to be treated should be marked and as far as possible rectangular and normally about 50 mm should be taken into the sound concrete to make sure that all unsound concrete is included. Cracks and their location can be identified from the top surface of PQC and some from the sides. Then judge the extent of cracking in concrete by any one of the following methods.

1. Visual Survey the affected PQC Surface. This should preferably be done after rains or after washing the surface with water.
2. Measure the width of cracks at top of PQC surface by thickness gauges.
3. NDT: Non-destructively estimates the extent of cracking by using the NDT technique. A commonly adopted NDT technique is Ultrasonic Pulse Velocity Measurements using UPV meter.
4. Core Drilling: Take cores at the apparent location of cracks that are seen from the top, up to a full depth of PQC. Generally, cores can be taken of 100 or 150 mm in diameter.
B) Classification Of Cracks and Repair Methods:
The cracks may be classified in following categories:
Small Hair Cracks (<1mm) – seen mainly at top.
Medium / Partial or half depth cracks
Full depth cracks
Many checker cracks in any one panel of PQC.
Pot holes and Corner damages
Settlement of panel or Multiple cracks near expansion joints.
Such Surface Cracks develop in PQC due to temperature difference, late joint cutting, defective curing of PQC, etc. The cracks will allow water/mud/debris to go into the cracks and widen them further.
Medium or Full depth cracks:
Some typical Medium or Full-depth cracks are shown in Figure 1.
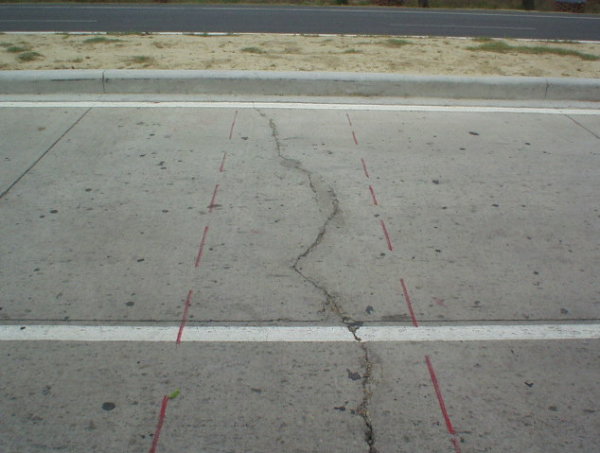
Pavement Surface
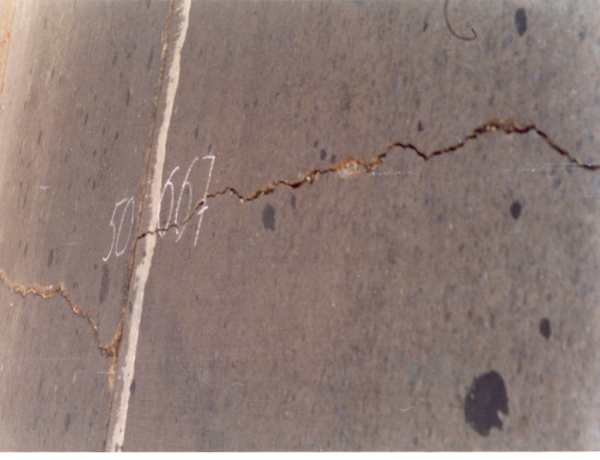
Figure 1: Typical Cracks in PQC
Settlement of panel or Multiple cracks near expansion joints:
Such cracks normally develop because of poor compaction or poor Concrete Mix Design. Some typical cracks are shown in figure2.
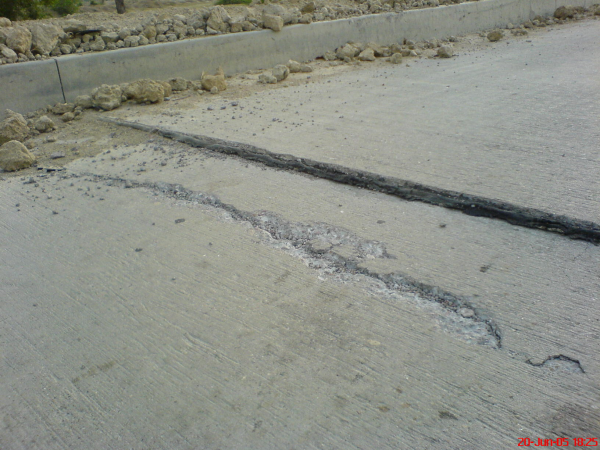
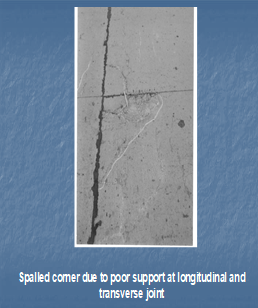
Figure 2: Typical Panel Settlement or near panel Cracks
Visually examine all such cracks and decide which crack is to be repaired on the basis of width, depth, and pattern. In general hair or micro-cracks do not affect much the structural integrity of PQC. Thus remedial works or repair of such cracks may not be necessary. However, partial/half depth cracks should be repaired. About full depth cracks and many checker cracks, it must be decided on a case-to-case basis after looking at the site and analyzing the condition depending upon its width, length, and a number of cracks in a panel as to what treatment is to be given.
Repair Materials For Crack:
- The material, techniques / System for repairing the PQC cracks should be such which will have the durability of a minimum of 10 – 15 years or as per the designed life of the pavement. Otherwise, water may penetrate from these cracks and reach sub-grade and embankment levels causing settlement.
- This will ultimately damage the pavement. Hence it is necessary that a methodology and guidelines for the repairs & rehabilitation of such cracks in PQC be developed.
- Normally the repair material should remain flexible enough to accommodate anticipated expansion & contraction, water-tightness, etc. Repaired cracks should not be rigid otherwise the cracks may appear again in the same panel at adjacent panels.
Following are some of the material used in crack repair.
Very Low Viscosity Epoxy Material
Epoxy Modified Mortar
Polyurethane based coating over Epoxy Mortar
Elastomeric Concrete
Fiber Reinforced Concrete.
1. Very Low Viscosity Epoxy Material:
It is a free-flow epoxy grout material designed for grouting gaps of low width like 0.5 to 10 mm. This epoxy repair compound or free-flowing epoxy resinous grouting material or similar product is a very low viscosity liquid of around 10 poise or so. Epoxy compounds like RESICRETE of SWC or CONVEXTRA EP10 (M) of FOSROC which is normally supplied as a two-component product consisting of base and hardener can be used. This should normally have a viscosity of 2-4 poise at ambient temperature. The Compressive strength of such material should be at least 60-70 MPa or 1 ½ time the Compressive strength of concrete used for PQC.

2. Epoxy Modified Mortar:
Epoxy mortar is a common material used for the repair of concrete surfaces in general, especially for the potholes in rigid pavements. However, 100 % epoxy-based mortar is a little brittle in the long run; hence in the case of repairs of pavements, its modified products should be used such that the resultant material is not rigid.
The Epoxy Mortar can be modified by:
- Adding about 5 % Poly-sulphide polymer in the epoxy resin as it basically needs to modify the formulations of epoxy-based mortar. Many companies have started manufacturing Epoxy Poly-sulphide mixed-based mortar.
- It will not only improve the life of mortar but also gives flexibility which is required in the repair of the mortar used for the pavements.
- By adding Poly-sulphide polymer, it improves the UV resistance.
3. Polyurethane based coating over Epoxy Mortar :
As epoxy mortars are non-UV resistance, but still it is a good high strength material, so use a polyurethane-based coating on the repaired surface of mortar that is exposed to UV or direct sunlight. This coating will protect the existence of epoxy mortar till the time mortar remain intact & not start to lose its property of non-brittleness. PU coating should normally be of about 300-micron thickness.
4. Elastomeric Concrete:
This is an epoxy modified cement concrete used in repairs not only in PQC crack repairs but also in structures and concrete surfaces. For PQC Crack repairs Elastomeric concrete is useful material.
5. Fiber Reinforced Concrete:
- Fiber-reinforced concrete is a concrete having small size aggregate (say 6 mm or so) or Cement sand mortar. It is mixed with any one of the different types of fiber given below which are generally used in construction.
- Poly propylene Fibers are more appropriate for this purpose.
- Though, there are several types of fibers available as given below.
- Normally fiber concrete can also be used as a thin top layer or bearing surface over the cracked PQC pavement after treatment of cracks.
Steel Fibers
Carbon fibers
Glass Fibers
Poly propylene Fibers etc.
Repair Method Of PQC In Pavements:
Repairs can be classified into following categories:
1. Partial Depth repairs (Transverse as well as Longitudinal) of PQC.
2. Repairs of longitudinal cracks by using U-type anchorages/stitching.
3. Repairs of the pavements especially for the areas where aggregates are exposed due to various reasons like after concreting sudden rain started or due to more tear & wear of concrete etc.
4. Re-surfacing of Pavements by Fiber Reinforced Concrete / Mortar for betterment.
5. Cross Stitching / stapling of panels/cracks: Repair the cracks by putting dowel bars with caps & tie bars so that it can have some space to have movements.
6. Repairs of Potholes and corner spalls in concrete pavements etc
Repair of minor Cracks (<1 mm wide):
These are very low-width cracks or hairline cracks. Such cracks generally do not affect the performance of road surfaces. Thus these cracks, unless the severity level increases, need not be repaired. Further, observe these cracks over a period of time for enlargement.
Medium Cracks (generally 1 to 5 mm wide):
If cracks are not moving then a very low viscosity epoxy resin may be used for its repair with or without fine sand to bond the crack faces. V-shaped ‘joint wells’ are made with 3 to 5 mm saw blades. Also, make 8 to 10 mm diameter grout holes at regular intervals. Then pump the epoxy bonded into holes using a grout gun.
Partial Depth Repairs:
- The spalling of concrete occurs near the joints mainly due to adjacent slab load transfer-related movement at the joint, particularly in summer.
- The spalling will occur frequently in mid slab locations and other locations mainly due to high slump due to w/c ratio, poor construction, or failure of earlier done repairs.
- Spalls are a localized problem and can be easily repaired with partial depth repair methods.
Full Depth Repairs:
The full depth repairs are necessitated due to Transverse Crack in the slab in full panel width. This crack may be in one lane or both lanes. The reasons for such crack are:
Locking of Transverse Joint:
The joint does not function due to the non-functioning of dowel bars. These dowel bars either get misaligned during construction or slurry gets into sleeves and prevents their movement
The intermediate crack may be caused due to too much resistance offered by the rough surface of the underlying DLC.
The crack may also develop due to thermal changes coupled with large joint spacing.
In all such cases where cracks are more harmful, then the QPC Panel should be examined carefully if the panel is to be repaired or removed. If it has to be repaired then use the technique of cross-stitching method. However, if that portion of the panel is to be removed and then recast the panel as indicated by Removal of Existing Unsound Concrete.
I. Repair By Grouting of Low Viscosity Epoxy Material:
a) Equipment for Repair:
Depending upon the method of repair the following equipment may be used.
Grouting Pump of capacity about 5-10 Kg/cm2.
Mechanical Grout Mixer
Air Compressor
Injection Ports
Hand Chisel, trowel, etc.
b) Preparation for Crack Repair:
-
- On both sides of the crack, the side edges are slightly chiseled to give a V-shape. If required do chiseling until a hard concrete is encountered.
- Remove loose material from the crack area and blow out the dust and debris from the gap of the crack by using a compressor or air blower.
- Drill holes in PQC surface in the line of Crackup to a depth of about 150mm & 10 mm diameter @ 300 – 400 mm c/c as shown in figure 3.
- Fix Injection ports (Nipples) of plastic or similar material ie nozzles of 6-8 mm in diameter and 100mm length into the holes using an appropriate gluing compound like Araldite. Keep the projection of the nozzle outside the PQC to about 20 mm.
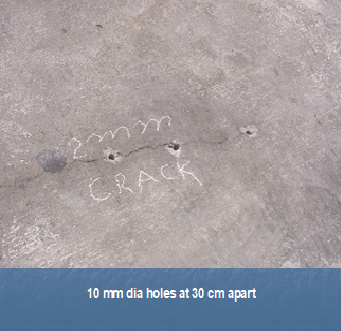
Figure 3- PQC crack showing the Grout holes.
c) Repair Procedure:
- The surface to be repaired may be pre-wetted or bring it in SSD condition.
- Apply a coat of primer-like acrylic bonding agent using a brush after scrubbing it well on the prepared surface. Allow the primer to become tacky, which normally takes 10 – 15 minutes or as given in the manufacturer literature.
- Push the Compressed air into the crack to flush out the dust and all foreign material from the crack to the side or top.
- Fill the top of the V-grove portion with appropriate Epoxy modified mortar.
- Use the epoxy repair compound or free-flowing epoxy resinous grouting material or similar product of very low viscosity.
- Prepare the mix of the repair material as directed by the manufacturer or Mix them mechanically with the Grout mixture after weighing them in recommended proportions.
- Recommended water quantity (if water-based) will be measured added to the polymer component and mix it thoroughly. The powder component will be mixed until a homogeneous mix is obtained.
- Pressure Inject the above material or appropriate ultra-low Viscosity epoxy liquid first in the middle nozzle from one side of the crack. Continue till it is forced out of the next nozzle or from the side of PQC crack. Then shift the injection procedure to the next nozzle.
- After the injection is complete, estimate the consumption of grouting material or find out the quantity of injected material. This may be compared with the estimated quantity.
- If possible ask a supervisor from the suppliers of material to supervise the job as per their recommended procedure and specifications during the use of the product.
- Apply the mix within the pot life of the repair compound on the prepared crack.
d) Finishing of Repair Surface of Crack:
If sagging on the surface occurs during application to PQC surface, then Polyurethane based coating may be applied by trowel in smaller thickness in one or two layers.
The applied mortar shall be finished with wooden floats.
When the injection operation is over then cut the projected portion of nozzles and sealing the portion by Epoxy Mortar.
After completion of repair of the joints, spalls, partial depth repair, corner repairs, etc sealing of expansion joints should be done immediately using polyurethane coating otherwise joints might leak & will create problems in the future.
e) Curing of Repaired Surface:
The repaired surface shall be cured by curing compound or water curing, if required or as recommended by the manufacturer.
II. Repair By Stitching or Cross-stitching of Cracks:
- Cross-Stitching is a repair technique mostly used for longitudinal cracks which are in reasonably good condition. The purpose of cross-stitching is to maintain aggregate interlock and provide added reinforcement for strength.
- The tie bars used in cross-stitching prevent the crack from vertical and horizontal movement or widening. This technique knits the cracked portions of the slab together and reduces the chances of a crack growing further.
- Cross-stitching uses deformed tie bars drilled across the crack at an angle of 30-40 degrees. Deformed steel bars of 10-12 mm diameter are sufficient to hold the crack tightly closed and enhance aggregate interlock.
- Full-depth holes of 18-20 mm diameter are drilled at a pitch distance of 300 mm with an offset of about 150 mm from the crack. The holes are drilled alternately from each side of the crack so that it passes through the crack from left to right, while the next from right to left.
- After drilling, the holes are flushed with high-pressure air to clean out any residual dust. Then a high-strength epoxy gel adhesive is injected into the hole. Immediately after injecting epoxy, deformed steel bars are inserted into each hole.
- The crack is sealed at the top with silicon/epoxy modified sealant.
III Removal / Replacement Of PQC Panel which has large cracks:
Removal of Existing Unsound Concrete:
A minimum of 50 mm deep rectangular cut should be made at the end of the panel which is to be removed. Use a saw cutting machine with vertical faces. Inside this panel mark rectangle, the smaller square of size 100 mm × 100 m and 25-30 mm deep.
These are marked to remove in parts. The smaller square should be chipped off with chisel. If jack hammer is used, it should not be more than 14 Kg. in weight. After removal of unsound concrete, a reassurance hammer-striking is done and any left out unsound area is also removed by enlarging the rectangle. If the unsound concrete penetrates more than half depth of slab then full depth of panel should be removed.
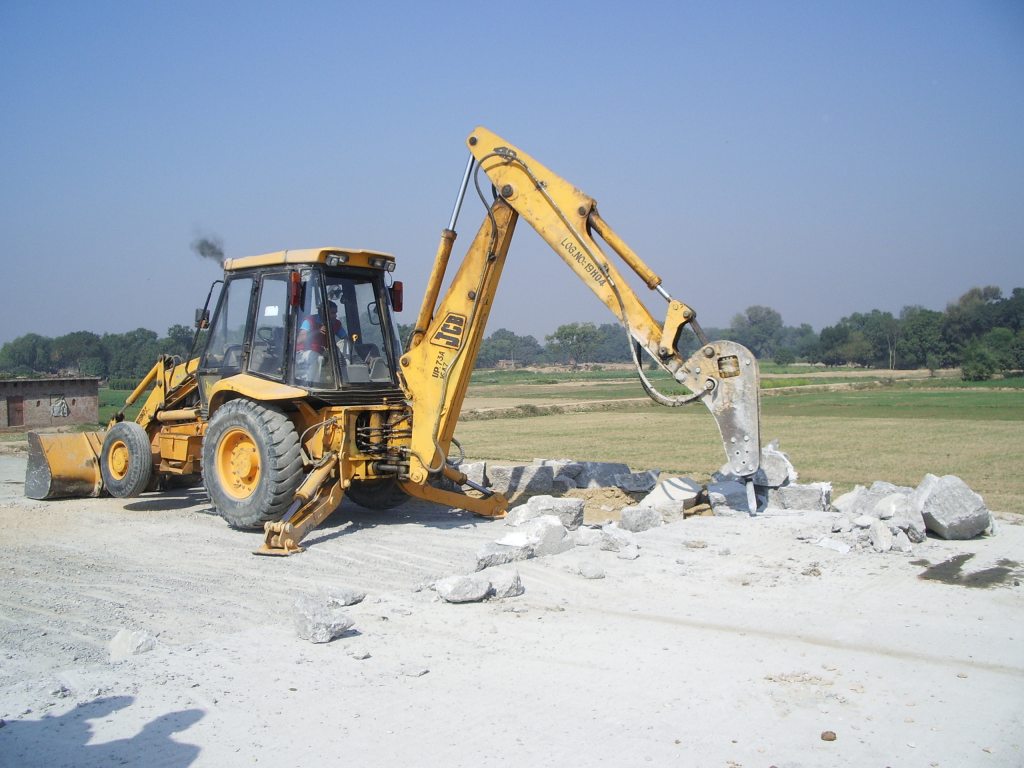
Breaking the Old Concrete:
Breaking the old concrete
A saw cut usually as deep as possible is made to include all unsound concrete. Once this cut (full depth or partial maximum depth) has been made, about 100 mm deep cuts are made with circular diamond saw-cutters. On the surface of the cut-out slab, some 75 mm × 75 mm or 100 mm × 100 mm square saw cuts are made to facilitate the breaking of concrete by a jackhammer.
The recasting of Panel Concrete:
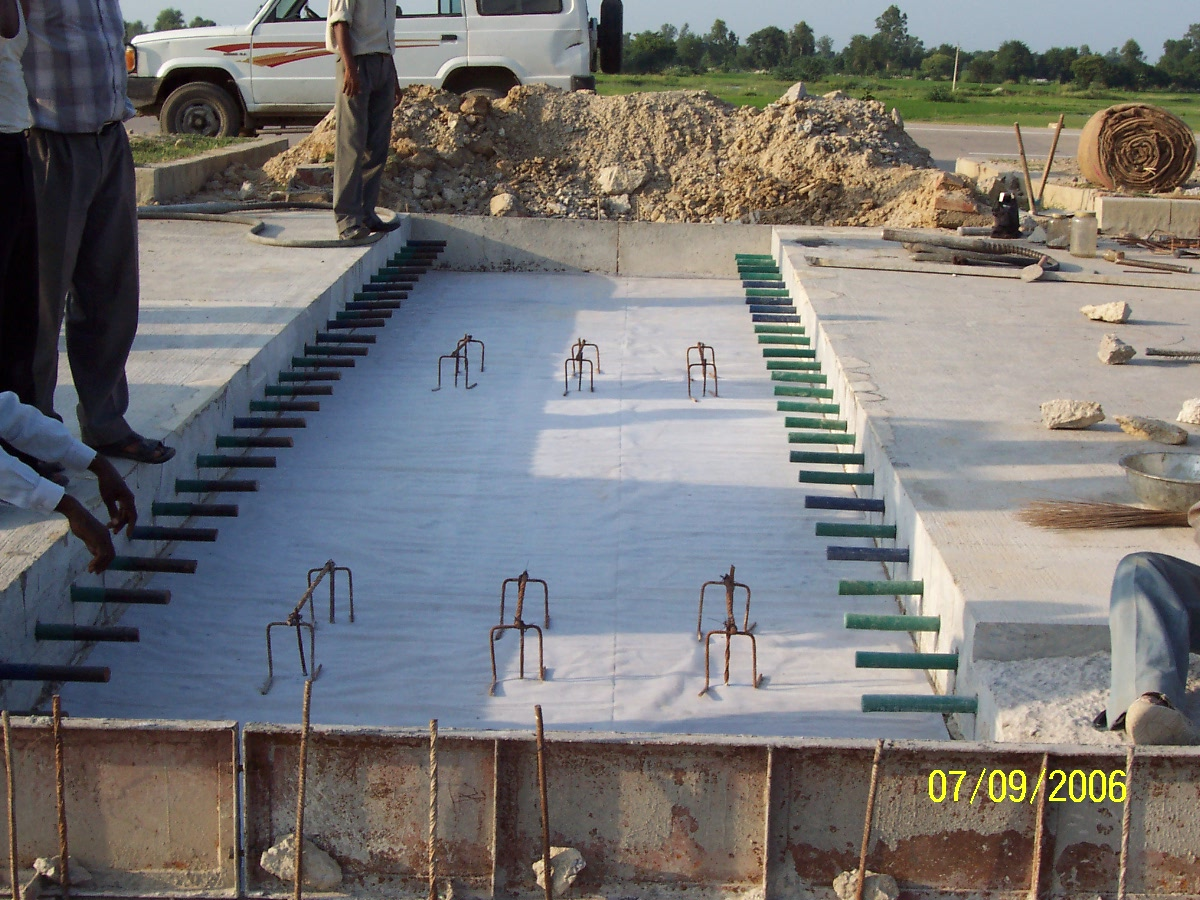
Once the old concrete is removed the panel can be prepared for recasting. A typical view is shown in figure 4. The PQC used for recasting should be used should be of the same grade as of original grade concrete. While recasting the panel, Dowel bars and tie bars should be put in the panel as shown in the figure. Other procedures areas used in original casting.
References:
Report on Defects and Distress of Rigid Pavement Sections:
The survey, Rating, Monitoring, Causes and Repair By Jose C. Horta
(1) Binod Kumar, Dr. Saroi Gupta, Dr. V. K. Sood, 2004, Restoration Techniques for Distressed Concrete Pavements, Technical Papers, Seminar on Design Construction and Maintenance of Cement Concrete Pavements, New Delhi, 8-10 October 2004, p. IV-101 to 110
(2) Committee of State Road Authorities, Pretoria, South Africa, 1990, Standard Nomenclature and Methods for Describing the Condition of Jointed Concrete Pavements, Technical Recommendations for Highways, Draft TRH19:1989, p. 1 – 49
(3) D. C. De, S. K. Bagui, 2004, Approach to Maintenance of Concrete Roads, Technical Papers, Seminar on Design Construction and Maintenance of Cement Concrete Pavements, New Delhi, 8-10 October 2004, p. IVK-1 to 21
(4) Helmut Eifert, Alf Vollpracht, Otmar Hersel, 2004, Strassenbau Heute: Betondecken, Bundesverband der Deutschen Zementindustrie, Duesseldorf, 175 p.
(5) Josef Eisenmann, Guenther Leykauf, 2003, Betonfahrbahnen, Ernst & Sohn, 321 p.
(6) R. K. Jain, M. M. Shangal, 2004, Maintenance and Repairs of Concrete Pavements, Technical Papers, Seminar on Design Construction and Maintenance of Cement Concrete Pavements, New Delhi, 8-10 October 2004, p. IV-87 to 99
(7) S. G. Joglekar, D. C. Saha, 2005, Defects, Repair and Rehabilitation of Concrete Pavement, Seminar on High Speed Road Corridors, New Delhi, 23 – 24 September 2007, p. 2:51 – 59
(8) Satander Kumar, 2004, Causes of Distress, Repair end Maintenance of Concrete Roads, Technical Papers, Seminar on Design Construction and Maintenance of Cement Concrete Pavements, New Delhi, 8-10 October 2004, p. IV-2 to 14
(9) Satander Kumar, 2005, Good Quality Concrete Roads and their Maintenance, Seminar on High Speed Road Corridors, New Delhi, 23 – 24 September 2007, p. 2:145 – 152
(10) H. S. Mildenhall, G. D. S. Northcott, Department of Transport, Cement and Concrete Association,1986, A Manual for the Maintenance and Repair of Concrete Roads, London, HMSO, 80 p.
(11) Gruening Schuster, 2002, ZTV Beton-StB 01 Komentar, Kirschbaum Verlag Bonn, 424 p.
(12) Mohamed Y. Shahin, 1994, Pavement Management for Airports, Roads and Parking Lots, Chapman & Hall, New York, London, 450 p.
(13) Dr. V. M. Sharma, 2004, Diagnostic Investigations and Repair of Cement Concrete Pavements – State of the Art, Technical Papers, Seminar on Design Construction and Maintenance of Cement Concrete Pavements, New Delhi, 8-10 October 2004, p. IV-133 to 144
(14) The Indian Roads Congress, 2002, Standard Specifications and Code of Practice for Construction of Concrete Roads (Third Revision), IRC:15-2002, 120 p.
(15) The Indian Roads Congress, 1979, Tentative Guidelines for Repair of Concrete Pavement Using Synthetic Resins, IRC:77-1979, 33 p.
(16) Vikas V. Thakar, 2004, Maintenance and Rehabilitation of Cement Concrete Pavements – State of the Art, Technical Papers, Seminar on Design Construction and Maintenance of Cement Concrete Pavements, New Delhi, 8-10 October 2004, p. IV-111 to 132
DIFFERENT METHODOLOGIES FOR REPAIR OF CRACKS IN PQC IN CONCRETE PAVEMENTS